You will need the following:
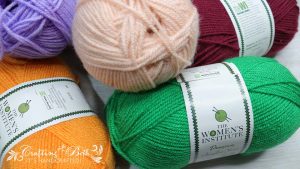
- wool/ yarn suitable for 4mm hook
- 4mm crochet hook
- scissors
- darning needle
Step by Step Instructions
Crochet Stitches Standard: I am using the US/ International Standards
Popcorn Stitch:
- dc 4 into the alloted space.
- remove hook from the loop, insert hook into the 1st dc of the group, and back into the main loop (see figure on the left)
- yo, and pull through 2 loops.
Note: Always work at the front side. There is no turning on this pattern.
Let’s get started
Tension is very important, the yarn must be able to glide smoothly from your tension hand to the working hand, not too tight not too lose.
Foundation Ring:
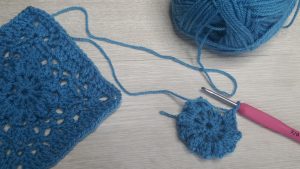
Start off with a slipknot, ch 4, sl st into the first chain to make a ring.
You can choose to use the open loop ring (also known as magic ring), it will also work as well.

Round 1:
- ch 4, this count as dc 1 and ch 1
- (dc 1, ch 1) into the ring 11 times
- sl st into the 3rd ch at the beginning of the round
Round Check: You should have 12 dc and 12 ch in total for this round
Round 2:
- sl st into the next ch space
- ch 4, dc 3 into the same ch space.
- remove hook from the loop, insert hook into the fourth ch at the beginning of this round, and back into the main loop
- yo, and pull through 2 loops. You have made your first popcorn stitch. ch 2
- (Popcorn st into the next chain space. ch 2) all the way across.
- sl st to the top of the first Popcorn stitch
Round Check: You should have 12 popcorn stitches and 12 12 ch 2 spaces in total for this round
Round 3:
- sl st into the next ch space
- ch 3, dc 2 into the same ch space. ch 3. dc 3 into the same space. (ch 3, sc into the next ch space) twice. ch 3.
- (dc 3, ch 2, dc 3) into the next ch space. (ch 3, sc in the next ch space) twice. ch 3. Repeat the anchor item 2 more times
- sl st into the third chain at the beginning of this round
Round Check: You should have 4 corners of (dc 4, ch 3, dc 4) stitches and 4 sides with 3 (ch 3) chain spaces in total for this round.
Round 4:
- sl st into the next 3 dc
- sc into the next ch space (ch 3, sc) into the same ch space. (ch 3, sc in the next ch space) 3 times. ch 3. Repeat the anchor item 3 more times
- sl st into the first sc at the beginning of this round
Round Check: Each of the 4 corners should have 1 (ch 3) space, and each of the 4 sides should have 4 (ch 3) chain spaces. 20 chain spaces in total for this round.
Round 5:
- sl st into the next ch space
- (ch 3, dc 2, ch 3, dc 3) in the same ch space, ch 2, sc in next ch space, ch 2, (dc 3 into the next ch space) twice, ch 2, sc into the next ch space, ch 2.
- (dc 3, ch 2, dc 3) in the next corner ch space, ch 2, sc in next ch space, ch 2, (dc 3 into the next ch space) twice, ch 2, sc into the next ch space, ch 2. Repeat the anchor item 2 more times.
- sl st into the third chain of the (ch 3) at the beginning of this round
Round Check: Each of the 4 corners should have (dc 3, ch 2, dc 3) stitches. Each of the 4 sides should have 4 (ch 2) spaces, and 2 sets of (dc 3) stitches for this round.
Round 6:
- ch 3, (dc in the next dc) twice.
- (dc 2 ch 2, dc 2) on the next corner ch space. (dc on the next dc) 3 times. ch 1, tr2tog with first leg on the first ch space and the next leg on the next ch space, ch 1. (dc on the next dc) 6 times. ch 1, tr2tog with first leg on the first ch space and the next leg on the next ch space, ch 1.
- (dc on the next dc) 3 times.
- (Repeat the anchor and star items) twice.
- Repeat the anchor item once more.
- sl st into the third chain of the (ch 3) at the beginning of this round
- Fasten off.
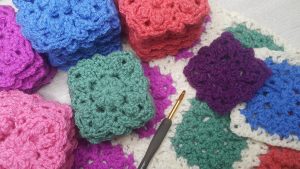
And there you have it. You should have your first Floral Granny Square final result.


