
How to crochet the Russian granny square (step-by-step-tutorial)
The Russian granny square is a textured masterpiece, where front and back post double crochet stitches sculpt raised ridges that frame each round with striking definition. At its centre, an embossed cross emerges, giving the motif depth, structure, and quiet elegance.

Discover the beauty of the Russian granny square
The beautiful Russian granny square features the front and back post double crochet stitches that create a lovely raised border line around each round. This subtle texture frames the square beautifully, giving it structure, depth, and a refined finish that feels both classic and unique.
If you enjoy traditional granny squares but want something with a little more character, this design is a wonderful next step. The textured ridges add definition without making the pattern complicated, making it suitable for confident beginners and experienced crocheters alike.
Take your time with each round, watch the ridges form, and enjoy how the square grows in your hands. Whether you turn your Russian granny squares into a cosy blanket, a statement cushion, or a collection of colourful motifs, each one will carry that beautiful textured border that makes this design so special.
Step by step instructions
Materials you’ll need
To crochet the Russian granny square, you’ll only need a few basic materials. I’ve listed what I used below, along with suitable alternatives so you can adapt the stitch to your own project.
For the yarn, it is typically requires you to use 4 complimenting yarns, say color(A,B,C, and D). You can still use 1 color if you’d like, ideal if you don’t want the fuzz of changing colors, remembering to always work at the front side of the square.
- Yarn: DK (light worsted) yarn
I recommend using a smooth, light-coloured yarn when learning this stitch, as it helps the ribbed texture stand out clearly. DK yarn works particularly well for practice swatches, scarves, and blankets. I used Stylecraft Special DK for this tutorial as it shows the ribbed texture clearly. - Crochet hook: 4.0 mm
I used a 4.0 mm hook for this tutorial. Ergonomic hooks like Tulip Etimo Murasaki crochet hook are especially helpful for textured stitches like this one, as they keep your tension even and reduce hand fatigue during longer sessions. - Scissors
For cutting yarn neatly at the end of your work. - Yarn needle
To weave in your ends once your swatch or project is complete.
Tip: If you tend to crochet tightly or loosely, don’t be afraid to adjust your hook size slightly to achieve a fabric you’re happy with.
To crochet the Russian granny square, you don’t need a specific brand of yarn. A smooth DK yarn works best, as it helps the texture and stitch definition stand out clearly.
Yarn options:
- UK gentle readers: A beginner-friendly DK yarn from Laughing Hen
- International readers: A wide colour selection of DK yarns from LoveCrafts
Crochet skills required
Crochet stitches standard: I am using the US / International standard crochet terms.
This stitch is suitable for confident beginners and above. Before starting, it helps to be comfortable with the following basic crochet skills:
- Making a slipknot
- How to crochet a foundation chains
- How to crochet the double crochet stitch
- How to crochet the front post double crochet (TRRF)
- How to crochet the back post double crochet (TRRB)
Featured stitches
What is TRRF in crochet you ask?
In the UK the front post double crochet in US/International crochet terms is called Treble crochet raised at the front (TRRF).
To make one, yarn over, insert your hook from the front perspective around the stem of another stitch from previous row starting from the right side of the stem out to the left side of it, and then yarn over to pull up a loop, then proceed with the double crochet
What is TRRB in crochet you ask?
Is simply the opposite. In the UK the back post double crochet in US/International crochet terms is called Treble crochet raised at the back (TRRB).
And to make one, yarn over, insert your hook from the back perspective around the stem of another stitch from previous row starting from the right side of the stem out to the left side of it, and then yarn over to pull up a loop, then proceed with the double crochet
Let’s get started
Tension is very important. The yarn must glide smoothly from your tension hand to your working hand — not too tight, not too loose — and follow the gauge of your hook.
Foundation ring
The Russian granny square is a typical square just like the standard granny square at the beginning, but it requires a wider ring. So to begin, with Color A start off with a slipknot, make it lose for the meantime. chain 6, and make a slip stitch into the open slipknot, then tighten it up.
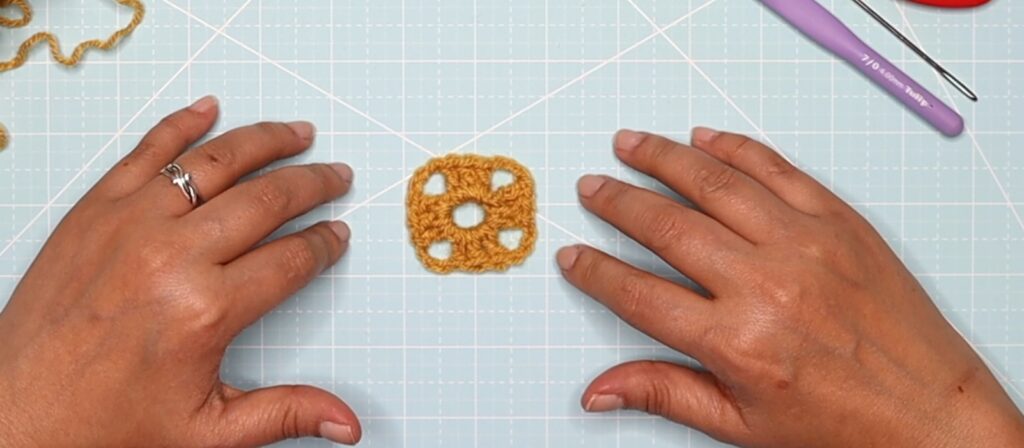
Round 1
To better close the first round, chain 6, the first 3 chains will be counted as the first double crochet, and the next 3 chains as corner space. [make 3 double crochet into the ring, chain 3] 3 times. Make 2 double crochet, and closing the ring on the 3rd chain at the beginning of the round. Cut the yarn, and tidy up.
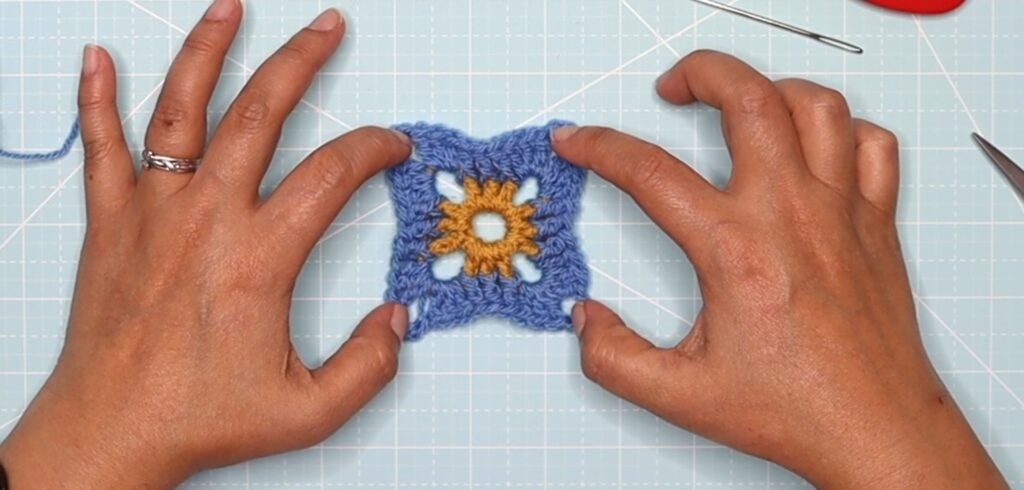
Round 2
I have my own way of starting a round with a double crochet. To join Color B, make a slipknot, you can make it tight. While holding your square facing front, yarn over, insert your hook in one of the corner spaces and pull up a loop, then proceed with the double crochet. This method skips the chain 3 to start the round.

Chain 3, make 3 double crochet into the same chain 3 space. Make 1 front post double crochet on each of the next 3 stitches. *[Make 3 double crochet in to the next corner space, chain 3, make another 3 double crochet into the same chain 3 space. Make 1 front post double crochet on each of the next 3 stitches]. Repeat * 2 more times. To complete the last corner make 2 double crochet and slip stitch next to the first double crochet made. Cut and tidy up.
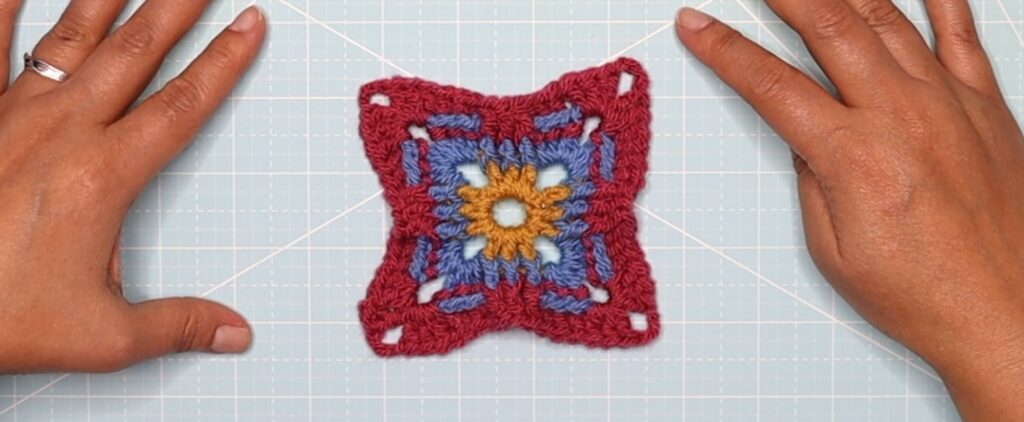
Round 3
While holding the square facing front, with Color C, make a slipknot, yarn over, insert your hook into one of the corner space of the square, yarn over and pull up a loop, then proceed with the double crochet. Chain 3. Make 3 double crochet into the same space. *[Make 1 back post double crochet in each of the next 3 stitches, make 1 front post double crochet in each of the next 3 stitches, and make 1 back post double crochet in each of the next 3 stitches]. **[Make 3 double crochet in to the next corner space, chain 3, make another 3 double crochet into the same chain 3 space]. Repeat [* and **] 2 more times. Repeat * once more. To complete the last corner make 2 double crochet and slip stitch next to the first double crochet made. Cut and tidy up.
Round 4
While holding the square facing front, with Color D, make a slipknot, yarn over, insert your hook into one of the corner space of the square, yarn over and pull up a loop, then proceed with the double crochet. Chain 3. Make 3 double crochet into the same space. *[Make 1 front post double crochet in each of the next 3 stitches, make 1 back post double crochet in each of the next 3 stitches] twice. **[Make 3 double crochet in to the next corner space, chain 3, make another 3 double crochet into the same chain 3 space]. Repeat [* and **] 2 more times. Repeat * once more. To complete the last corner make 2 double crochet and slip stitch next to the first double crochet made. Cut and tidy up.
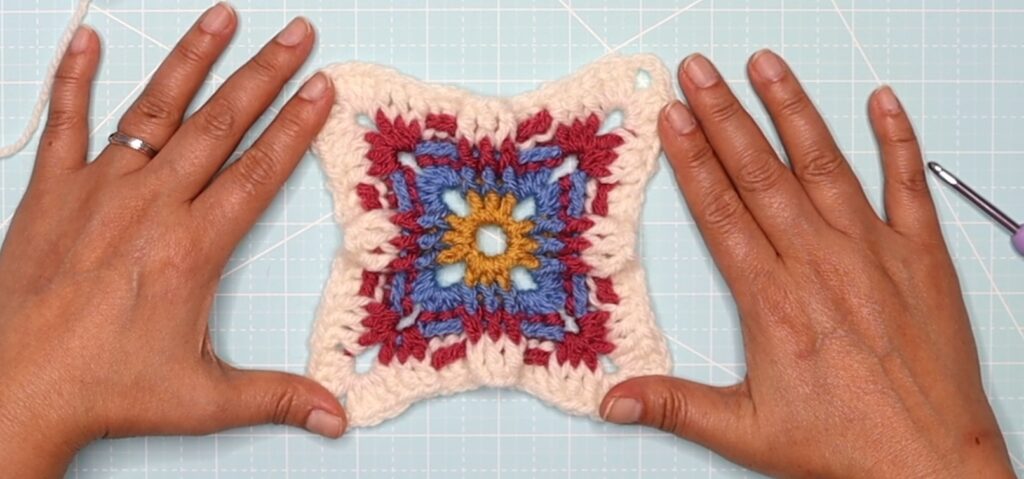
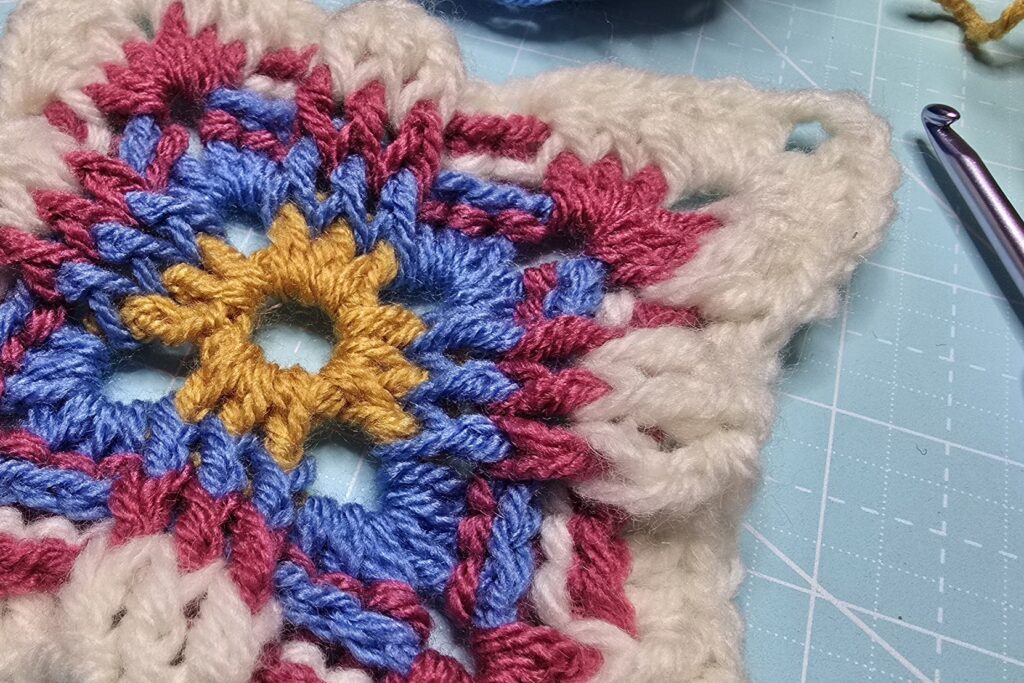
Look closely, and you’ll see the front post double crochet lifting from the fabric, shaping a proud, embossed cross at the very heart of the square. In response, the back post double crochet travels along the perimeter, etching delicate ridges that define and protect the design — a gentle interplay of depth and structure, working in perfect harmony.
© Crafting with Beth.
This pattern describes a common crochet technique. While crochet stitches and methods are not copyrightable, the written instructions, photographs, and explanations on this page are original and protected by copyright.
Made with care and shared with love. You may sell finished items made from this pattern, but please do not copy, reproduce, or redistribute the written instructions. Please credit Crafting with Beth when sharing your work.
